|
The "Screenshot" Bulk Key/Command Macros of the UPLINX Phone Control Tool enables you to quickly and easily collect screenshots for a group of phones, for example for a specific settings screen. Screenshot images can have custom file names and folders.
Note: to take a simple screenshot of a list of phones without specifying a particular page, you can use the Bulk Screenshots wizard
Screenshots of phone settings can be further compared to achieve audit results for upgrades and migrations.
To deploy the Screenshot macro on multiple phones, use the following steps.
Step 1: (Optional) Configure the Screenshot Macro
The Remote Phone Control Tool ships with a built-in action called "Screenshot" which saves the screenshot taken from a Cisco phone as C:\Users\%USERNAME%\AppData\Local\Uplinx Phone Control Tool\Screenshots\<Phone Name>.png . This default setting should work for most typical usage cases.
To modify settings in this default screenshot macro, remote control a phone in the [Remote Phone Control] tab, then select the [Macros] page on the right side, then choose the [Screenshot] macro from the macros list:
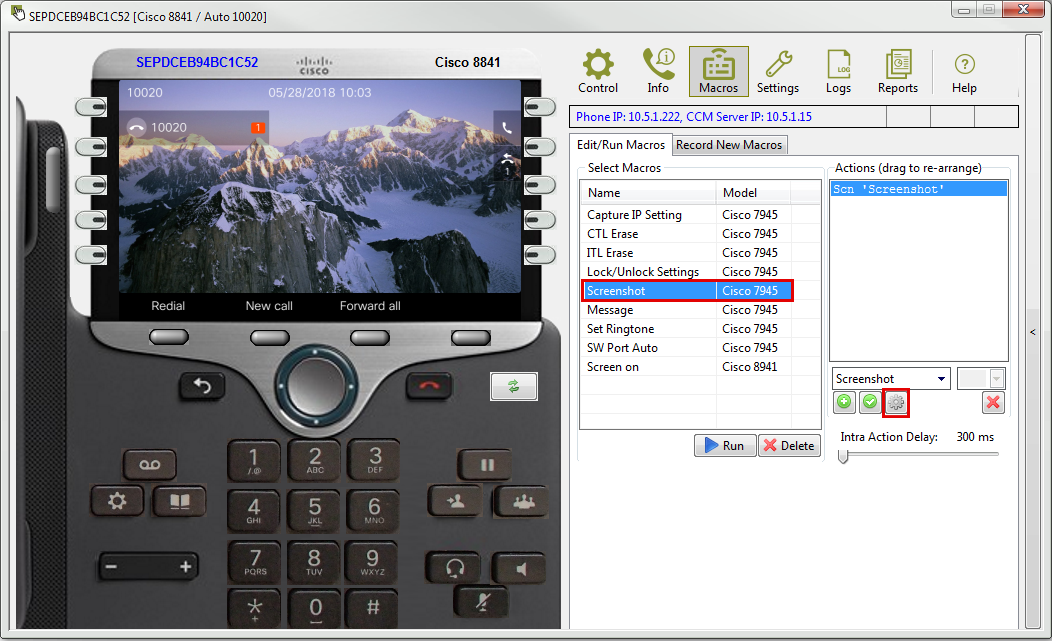
Click on the cog button in the "Actions" section to bring up the configuration window to define the location and file name of the screenshot:
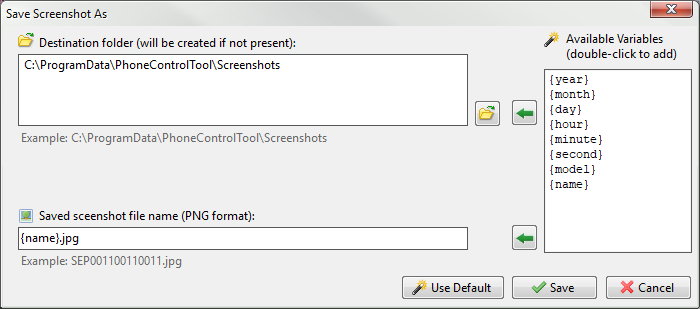
Enter the desired folder path and file name for the screenshot file (use the variables on the right side to customize the file location using wildcards), then click [Save].
Additionally, the Screenshot action can also be executed as a step in any key macro containing multiple keys (such as collecting certain administrative settings from the phones). Such a screenshot can be very useful for verifying the settings after applying a macro to multiple phones by examining the saved screenshot.
Step 2: Create the Bulk Macro
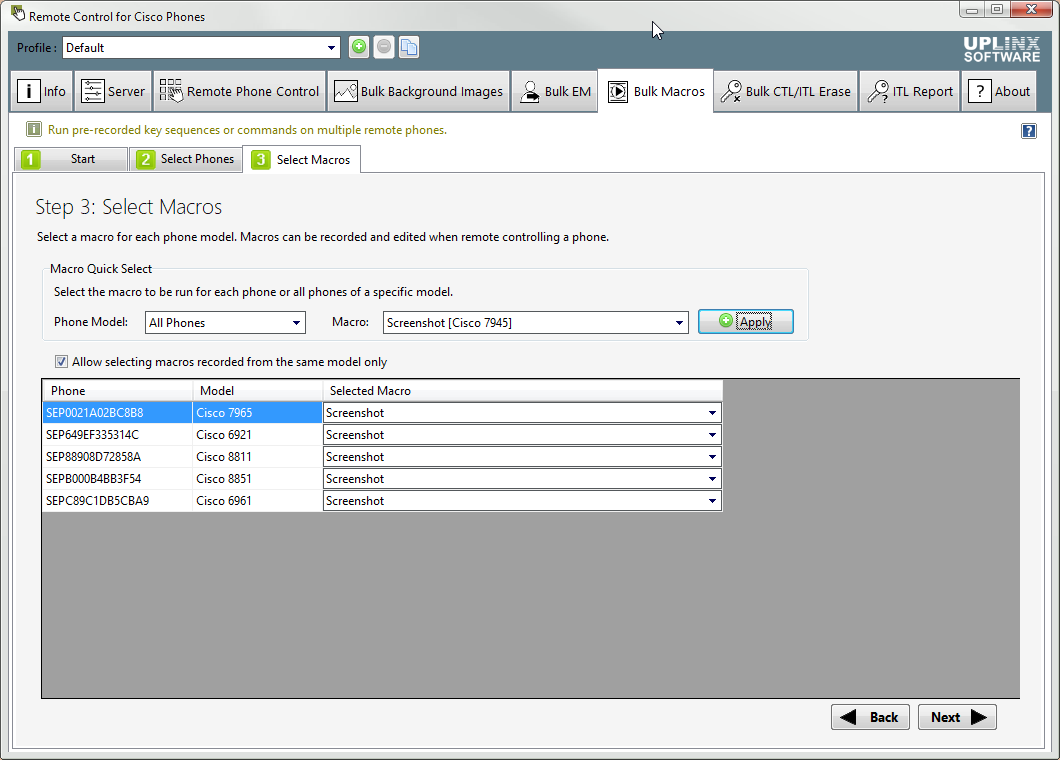
In the [Bulk Macros] tab, create a new Bulk Macro, then select the "Screenshot" macro in the "Select Macros" step.
Note that the built-in Screenshot macro is model independent therefore it will work on all models regardless of the model of phone the macro is created from. If a screenshot macro has been configured in Step 1 to contain model specific action sequences, make sure that the right macro is selected for each phone for the bulk deployment.
Step 3: Run the Bulk Macro
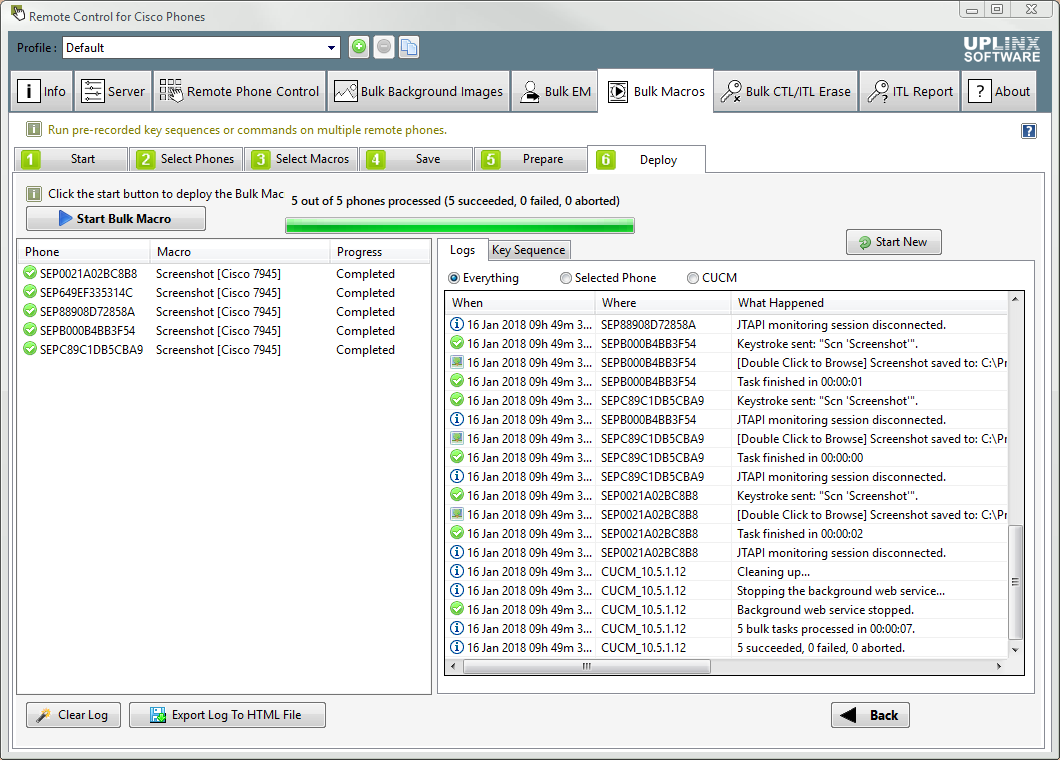
Proceed with the Bulk Macro runner and the Bulk Macro will be run on all the selected phones. Typically it will take less than a minute to process 100 phones using the built-in Screenshot macro and the performance may vary depending on network latencies and phone model. Processing of Cisco 9900 Series phones usually takes significantly longer.
If the Screenshot macro has not been modified, the collected screenshot files can be browsed at C:\Users\%USERNAME%\AppData\Local\Uplinx Phone Control Tool\Screenshots.Otherwise, browse to the folder configured for the macro in Step 1 to view the files.
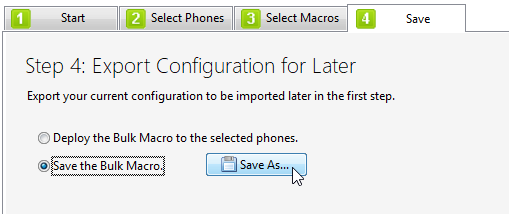
Step 4: Save the Bulk Screenshot Macro for the Command Line
Alternatively, the bulk screenshot macro can be run in the command line mode (and scheduled).
To achieve this, save the Bulk Macro as a .csv file as shown below. The file can also be easily edited in Microsoft Excel to add more phones.
Assuming that the Bulk Macro is saved as bulkmacro.csv, it can be executed from the Windows Command Prompt or any command line scheduler with the following:
|
PhoneControlTool.exe /bulkmacro <bulkmacro.csv>
|
|